Gorgias
Integrating
To help you integrate Gorgias with Thankful, we’ve written step-by-step instructions. Follow along with the step-by-step instructions below.
There are two key parts to the setup: 1) provisioning a seat for Thankful in your helpdesk, and 2) integrating your helpdesk into the Thankful dashboard.
Part 1: Provisioning a Seat for Thankful
You’ll need to create a Thankful user. Thankful will use this agent to reply to your customers, just like an agent.
- The email must be set to: be+your_company_name@thankful.ai
- This must be an admin account.
Part 2: Integrating into the Dashboard
-
Go to Integrations and click “+ Add Helpdesk Integration”, select “Gorgias” from the dropdown list.
-
Fill out the “Agent Email,” “Subdomain,” and “Support Email Fields” within created integration.
-
Click “Save” on the integration and establish the OAuth2 connection with Gorgias by following the prompts after your browser redirects.
-
Click “Notification Endpoints” and “+ New Notification Endpoint,” naming this “Gorgias” if you have only one brand and region, but if you want to support multiple ecommerce backends or customize responses based on the brand, create one endpoint per region or brand. Click “Save” and take note of the generated URLs, which we’ll need soon.
-
In your Gorgias dashboard, click Settings->Integrations. Find the “HTTP” integration and click in to it.

-
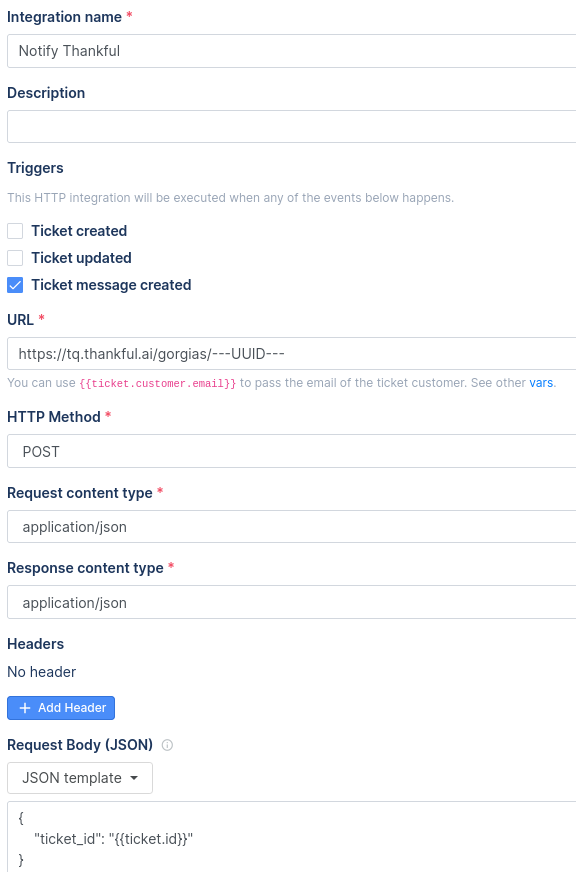
Click “Add HTTP integration,” name it “Notify Thankful,” enable the following events: “Ticket Created”, “Ticket Message Created.” Click in to the “URL” textbox and paste the url you copied from Thankful earlier. Click the “HTTP Method” dropdown and select “POST.” Leave everything else as default, then click “Add Integration.”
Congratulations, you’ve integrated Gorgias!
Supported Features
The following features with checks are supported in this helpdesk.
| HTML | ✔ |
| Emoji | ✔ |
| Inline Images | ✔ |
| Read Attachments | ✔ |
| Merge Tickets | - |
| Create Tickets | - |
| Tags | Value-based |
| Chat Buttons | - |
| Channels | Email, Gorgias Chat |