Help Scout
Integrating
To help you integrate Help Scout with Thankful, we’ve written step-by-step instructions. Follow along with the step-by-step instructions below.
There are two key parts to the setup: 1) provisioning a seat for Thankful in your helpdesk, and 2) integrating your helpdesk into the Thankful dashboard.
Part 1: Provisioning a Seat for Thankful
You’ll need to create a Thankful teammate. Thankful will use this teammate to reply to your customers, just like an agent.
- The email must be set to: be+your_company_name@thankful.ai
- This must be an administrator account.
Part 2: Integrating into the Dashboard
-
Go to Integrations and click “+ Add Helpdesk Integration”, select “Help Scout” from the dropdown list.
-
Click “Notification Endpoints” and “+ New Notification Endpoint,” naming this “Help Scout” if you have only one brand and region, but if you want to support multiple ecommerce backends or customize responses based on the brand, create one endpoint per region or brand. Click “Save” and take note of the generated URLs, which we’ll need soon.
-
Once that’s done, you will need to Authorize Thankful to access your Help Scout account. In Thankful’s dashboard, click “Connect Help Scout” and then “Authorize.”
-
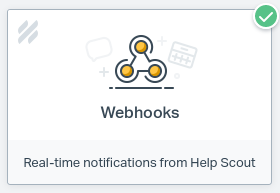
In your Help Scout dashboard, click Manage->Apps. Then click the Webhooks button, which looks like this:

-
Click “New Webhook,” label it “Thankful,” set a random secret key, for the callback URL enter the notification endpoint URL from earlier in step 2, use payload “Version 2,” toggle the “Webhook Enabled” checkbox so it is enabled, and click the following events: “Conversation Created”, “Conversation Customer Reply”, “Conversation Agent Reply.” Now click “Save.”
Congratulations, you’ve integrated Help Scout!
Supported Features
The following features with checks are supported in this helpdesk.
| HTML | - |
| Emoji | - |
| Inline Images | - |
| Read Attachments | ✔ |
| Merge Tickets | - |
| Create Tickets | - |
| Tags | Value-based |
| Chat Buttons | - |
| Channels | Email, SMS |